My picoCAD to Godot workflow
picoCAD is a very neat tool for creating and exporting lowpoly 3D models. I have a simple (and probably flawed) workflow for importing these models into Godot. This post is not about using picoCAD itself; it covers how I import the already-completed model into Godot 4.2.1 (the most recent version as of the writing of this post).
Export the model
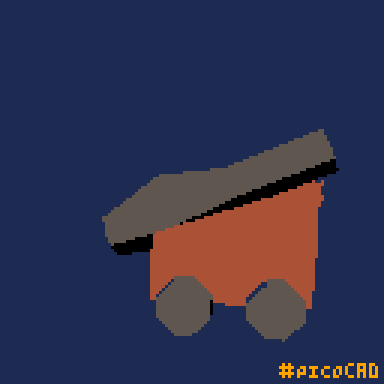
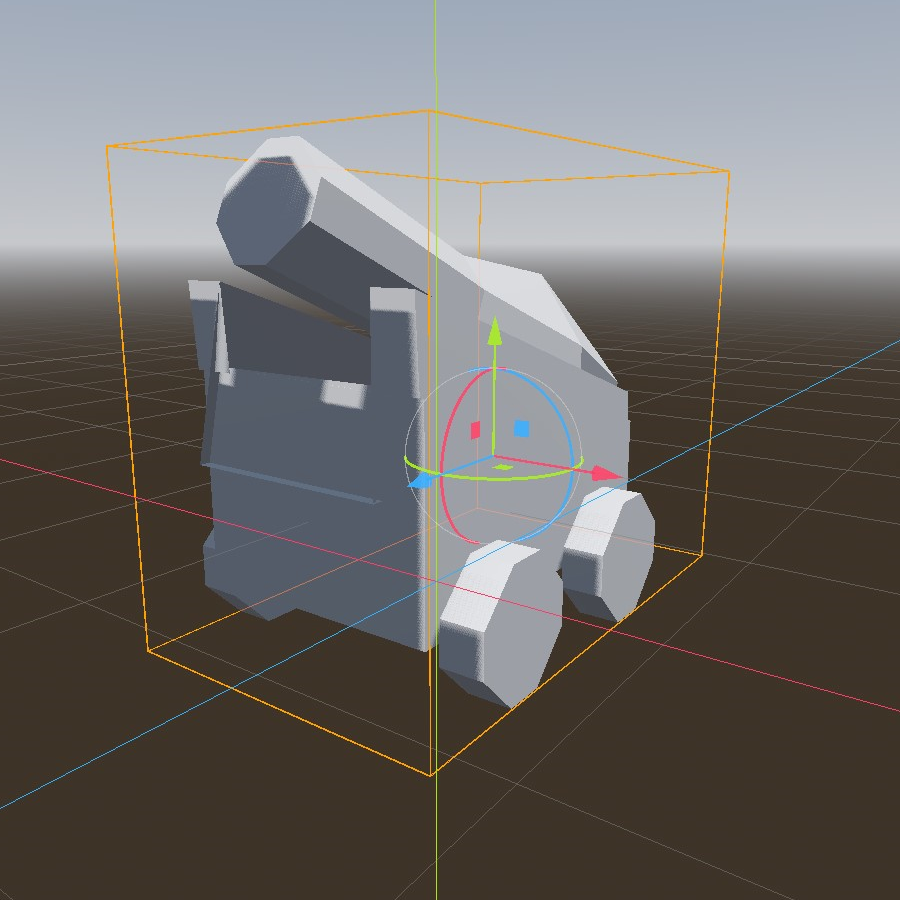
To start with, I have made a busted beautiful cannon model.
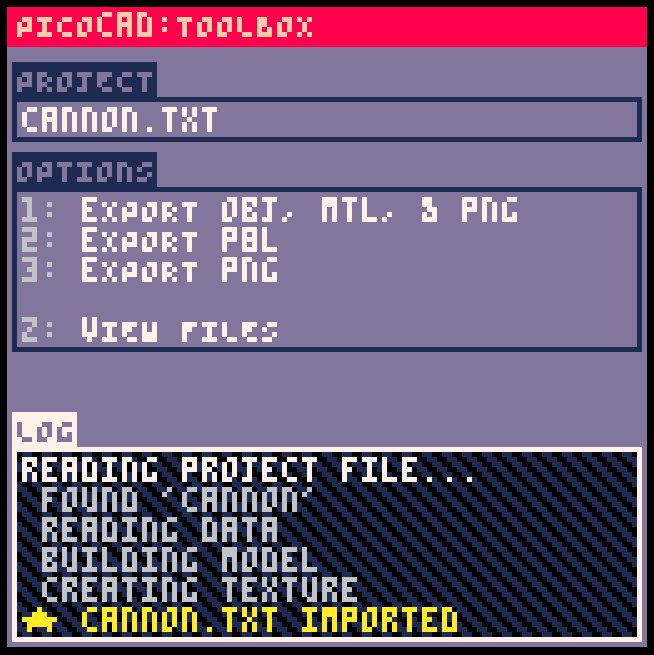
picoCAD's toolbox facilitates exporting to OBJ - simply drag-and-drop your picoCAD project file into the toolbox window and Export OBJ.
Fix the normals
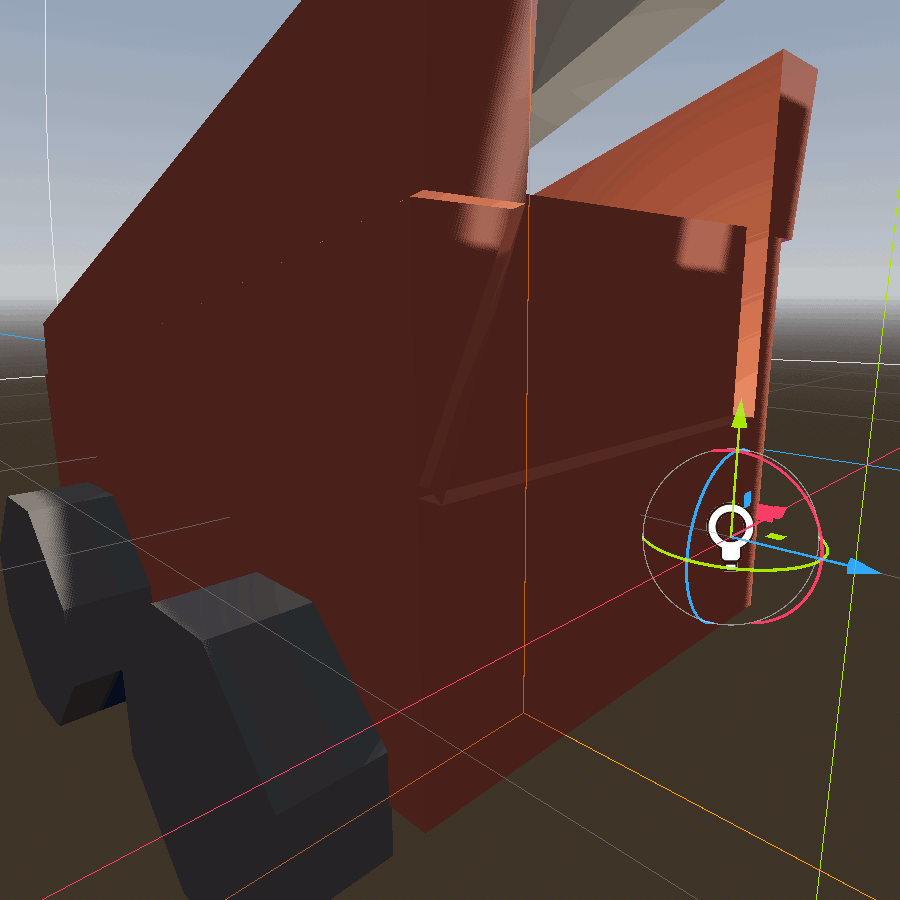
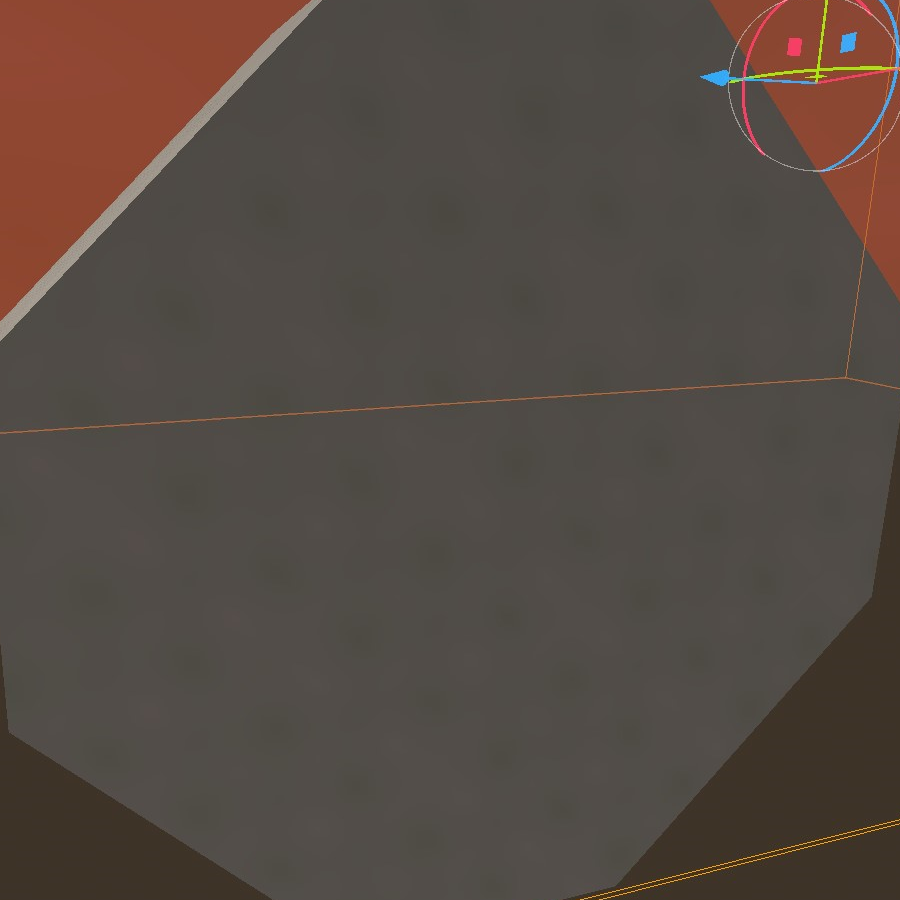
In my experience, something always goes wrong with the normals of my model. This results in issues like the following, where a particular face is illuminated from the wrong direction (inside the object).
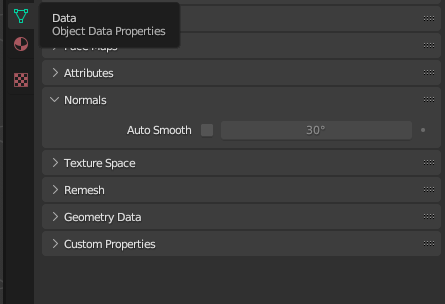
To get around this, import the OBJ into Blender, disable Auto Smooth, and export a new OBJ file.
Import into Godot
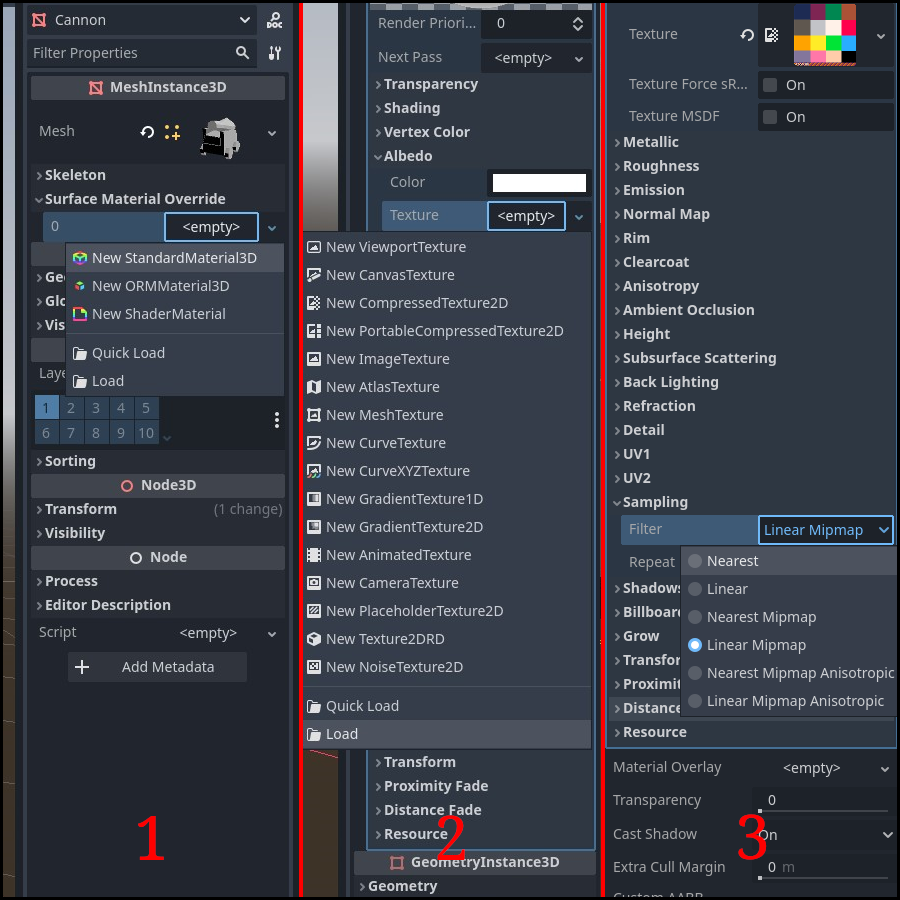
Import your OBJ and PNG files into your Godot project (I just drag-and-drop them from my file browser into the FileSystem panel). Then, add the OBJ file to your scene by dragging and dropping it directly into the scene view from the FileSystem panel. This should allow you to see your object in the scene, albeit with no texturing at all.
To apply your texture:
- select the model's node in the scene tree
- in the Inspector, under
MeshInstance3D, apply aNew StandardMaterial3Dto theSurface Material Overrideproperty (1) - expand this new material property, and find its
Albedoproperty Loada newTexture(2)- select your PNG texture
- expand the
Samplingproperty, and changeFiltertoNearestfor those eye-gougingly sharp pixels (3)
That should be enough to get your texture working correctly. However, you may notice artifacts resulting from the texture compression, like on my cannon's "wheel":
If this bothers you, it's an easy fix.
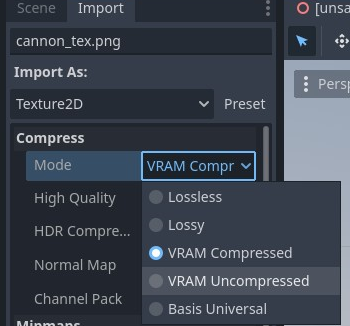
Reimport texture
Select the PNG file in the FileSystem panel. In the Import tab, choose a different Mode under Compress:
And that's it! I hope this helps you.